Well on my way to finishing, I present some images from recent progress:
As can be seen, all the image of the main image has been laid out in white. Now is just a matter of laying out the rest of the groundwork, and finishing the edges.
I also have a few photos and videos of process:
Painting setup. Due to leg injury am forced to paint on couch with leg raised
Swatch studies, so that I can both pick paints I want, and see how new combinations look.
video explaining swatch process
Now that i have begun the painting process in earnest, the fun time has begun! All the preparation has led to this moment. It is a fairly quick process, if I have the chance to just sit down and paint, from here to termination. I have picked the shapes of the holes to inform how the composition will go, using the natural holes in the wood to represent where holes, dark areas, or tunnels were in the composition. Also the lines have been matched up to where horizon lines or the limits on the Bridge. In any event, I am very happy to have gotten this far, in spite of all weird obstacles. Am also adding a few other photos for a blog post I neglected to write a few days ago, re. actual preparation of the wood.
I have done one coloured study, and it ended up taking a long while, because I possibly spent an two hours or more per layer. Halfway through this I was like "is this really necessary?" but by then I was fully committed and couldn't turn back.
So I am sharing all the layers, same pencils, etc. This is a throwback to a printmaking technique that I learned in college called lithography:
under this process, a person can create a complex composition by adding the colours in layers. IE first the yellow, then you ink the stone with that colour and run it through the paper, and wash, rinse, repeat for every colour, manipulating the stone so that the proper things are highlighted. The trick is to match the paper so that it all fits together. I am doing a crappy job of describing it, but what I'm basically doing is doing it a colour at a time, with the watercolour pencils, and having it all add up.
Yellow
Orange
Pink before watercolour
Pink after Watercolour
Red before Watercolour
Red after Watercolour
Brown
Green
Blue + touchups (E brown, black, etc)
Overall pretty satisfied with how it came out- some thigs I am unhappy about insofar as tonalities, but these problems would be resolved with oils because this medium of just using like 7 or 8 colours only has its limits
Still stumbling under a bum leg, but have reason to be optimistic. I see the doctor tomorrow who will have more to say about this. I believe it's healing well.
Jim went ahead and prepared the wood for painting - first he has sanded it, first by using the coarse sandpaper, then the light grade sandpaper, all the way to the lightest sandpaper.
More on this video here:
The next part of the journey is, how to edit the painting to account for the canvas size? I will on facebook her put forth 2 options, one is to just edit out the sky and put as much of the action as I can, and another option is to just make a smaller canvas so that the entire picture will fit?
This is the question I sought to answer next, by taking the wood, the original painting, and through PHotoshop, trying out different layout scenarios
Here is the first, straightforward one:
Simply to reduce the size of the painting so that most of it would fit onto the canvas, leaving large portions of the bare wood visible. If I were to go on this option, I probably would not have such a stark edge, but more or less have it be softer or more blended or at least more round
The second option is to try to fit more of the dramatic scenery into the canvas, which would mean eliminating some of the information, in this case, the sky so that the drama of the crowds watching takes precedence:
As can be noticed, my demos take the hole of the wood into account. I have to say here that even though I like the fact that there's more painting space and thus more details for the audience (and that's where Turner himself was at one point; at the beginning of the fire he and some art students rented out boats and were out there in the thick of it, sketching, then, when the roof of the building collapsed, everyone inexplicably laughed), I miss the dramatic, awesome sky and am not crazy re how the composition holds up.
The third version also removed information, but this time favouring the sky:
I actually like how this one looks the best, though Jim and others have noted how eliminating the drama of the onlookers is a big mistake.
The fourth version is based on #1, but involves making the decision to artificially extend the entire painting to fit through all the edges:
The advantage is it keeps everything in there - the sky, the audience - and it also makes use of the entire piece of wood. The painted version would obviously look a lot slicker than this quick Photoshop mock-up, but the basic idea is I would extend the sky and the bridge to the right, and the audience to the left. One disadvantage, aside from making stuff up, is that the exposition area is still small. This seems to me a visually more appealing option that just the small square though, or of leaving a lot of wood. Note again where the hole lies.
The fifth version is actually my favourite version - it actually uses the sky version (#3) which was my favourite one due to how much I liked the dramatic sky:
Here I made the #3 option, but extending the bridge as in the previous version, but also expanding the left side, and actually choosing to put all the boat people/rubberneckers/sketchers to the left hand side. In other words, I am redoing the composition, reinventing history, if you will.
I think it looks the best. I will look for feedback from others, either online or in the real world, but I'm pretty sure I will choose to do it this way.
Here are simply some progress sketches of the last black and white sketch
as seen, first just the outline across the board is laid out, and then the most dramatic scene to me (the place where the flame is consuming London and sending dark stuff through the ether - early on I realized in this sketch that for some reason I cropped like an inch off the left - so I had to just go with it
The second sketch begins adding more details on the boat and in the castle - also some of the people at the end are being added
in this one I'm adding more of the people on the lower left, adding details and darkness/contrast overall to the river and to the boats in the centre - I think here's where I began with an error in the castle area - in all my sketches so far I have had trouble calibrating elements in the castle
here we see more details emerging throughout the picture, more darks & lights, etc - also the error along the castle (I keep calling it a castle but it's really the parliament building) became solidified, so I had to simply go with it, once again. This is after all the sketching phase. Also finished the people on the right.
This is technically finished, but I am not liking how there are parts of it that are too stark, so I added graphite and blended in the smoke cloud.
Overall not happy with the dark of the sky but I think it's still an improvement over the 2nd sketch I did where I overdid everything
this is how far I will take it now. As I said, the left inch is gone, the sky is to heavy, and obviously I didn't finish the right edge in a finished way, and also the Parliament needs to be improved, but as I said I feel like this is as far as it needs to go
For contrast, I am posting the previous sketch to compare:
It only took me 2 weeks to put up a new sketch! Here it is, it is more black & white
the interesting thing about thsi sketch is that it is way too dark for the simple reason that I am utilizing a medium I am very unfamiliar with: watercolour pencil. I'm not that great with watercolour, period, and I used too much pigment. I mean, I was trying to go for more contrast than I did in the other sketch, but went way the other way. Also fudged the proportions a bit, but thats what this process is for. to get all the bad ideas out of the way!
One reason for my delay in painting is purely practical: I am still needing to find my art supplies from the time of the fire. After we signed the lease thru March on our new dwelling, we have had to spend an inordinate amount of time dealing with our stuff in storage, and the main issue has been, where are my paints? I have basically $1,000 worth of art supplies (esp. for oil and wood prep) in the storage unit, and I've been waiting to find them. Meanwhile I purchased these nice pencils.
The next step in terms of art process is to add colour. THat's what we use the pencils for as well. I am to make one or two more black and white, one or 2 more colour, and by then I trust we will have moved on to the 3rd step which will be painting on the wood panel itself. Jim prep process will be part of that as well as, most importantly, finding the paints.
By then the sketching will have taken me to the place I want to be, which is similar to the place that a musician or an actor wants to be when they are finally at curtain time, after having rehearsed for ages. I come from a primarily musical background, transitioning towards art in high school. What I have gotten from the musical process is a multi sketch method whereby I rehearse in advance what I want to lay out - different ideas, different force, different perspectives, or proportions, even, and then the final result is supposed to be the best characterization of all those things.
which of these boxes contains my paints?
The storage business gives me a reason to be forced to stay away from painting so soon.
THe summer allows for sketching in nature, suck as this video indicates:
This other video, taken near the Pigeon River in a lovely watering hole, shows Jim's wood gathering process, something else that occurs on these walks, making them both a huge part of myTurner art process and the Marshll Arts process I had described in the past.
Sadly, not all works out so well, and yesterday, this happened at most an hour after the above reasonably happy videos:
As can be seen from the above videos, the place is lovely but there's lots of room for error. In ten years running around through the Western North Carolina woods, this is the first time this happens to me. I fell bizarrely as I was hopping from rock to rock and slipped on one that was more wet than it appeared.
So if this post sounds disjointed and weird, it is because I am suffering physically and to an extent mentally due to the lack of caffeine since I hear that helps the fractured bone process.
Not for that do I believe that the painting project is compromised - blessedly it is a small canvas.
I just wanted to share an update re/ the awesome painting project I have received. One reason I had waited till now to do this was typical holiday things, where we ended up going to many lovely places:
Blue Ridge Parkway!
We have been camping for the 4th of July and other occassions, taking advantage of the lovely summer, and the fact that all the art selling from the past 3 years, which we have now transitioned out of, has ceased, allowing us to travel again and enjoy the nature which in large part inspired the Turner Project to begin with.
This inspiring vista comes from Whitewater Falls at Nantahala National Forest, on the edge of Jackson and Transylvania Counties.
The place Jim's standing on top of in this picture is the very very top of this amazing place:
But now, it is time to work, especially since I will finally have access to my painting supplies in about a week! Am very excited yet trepidations to unpack all our stuff from the fire storage unit where our things have been hiding for a long while.
In any event, here is an initial sketch - I will do a number of these in differing media so that I can feel confident re. technique and so that then I can focus on creating as expressive and overall awesome piece as I can.
The initial sketch phase is black and white, so as to get tonalities. What you do there is look at different parts of the painting as discrete shapes and blobs, and you sort of make yourself lose sight of a bridge, a flame, water, etc. You do this so that
a) you don't get stuck playing a proportions game you can never win
b) you do it so as to begin to approach a sense of 3 dimensionality - sometimes hard to achieve when you are working from a flat 2D surface as opposed to plein air
c) you want to aid your colour mixture when the time comes to add it in by working out values & hues independently of
d) it's a warm up! very necessary
e) it allows a different more creative way of looking at things
So here it is, and I think it went quite well - I succeeded in doing it in one sitting:
so here I can see what works, what needs help, etc.
I plan to do at least one more black white, and then colour like this in pencil with a pad before the time comes to really do it.
I am very excited to have a chance to be this methodical about it! The 90 Days project was so very fast that I had no time to really sit with a piece, get to know it, read up on it, etc. This allows a vertical v. horizontal immersion in the Realm of Turner.
I am very happy to say I have received a painting commission!
It will be the Burning of the Houses of Lords and Commons, which is this painting:
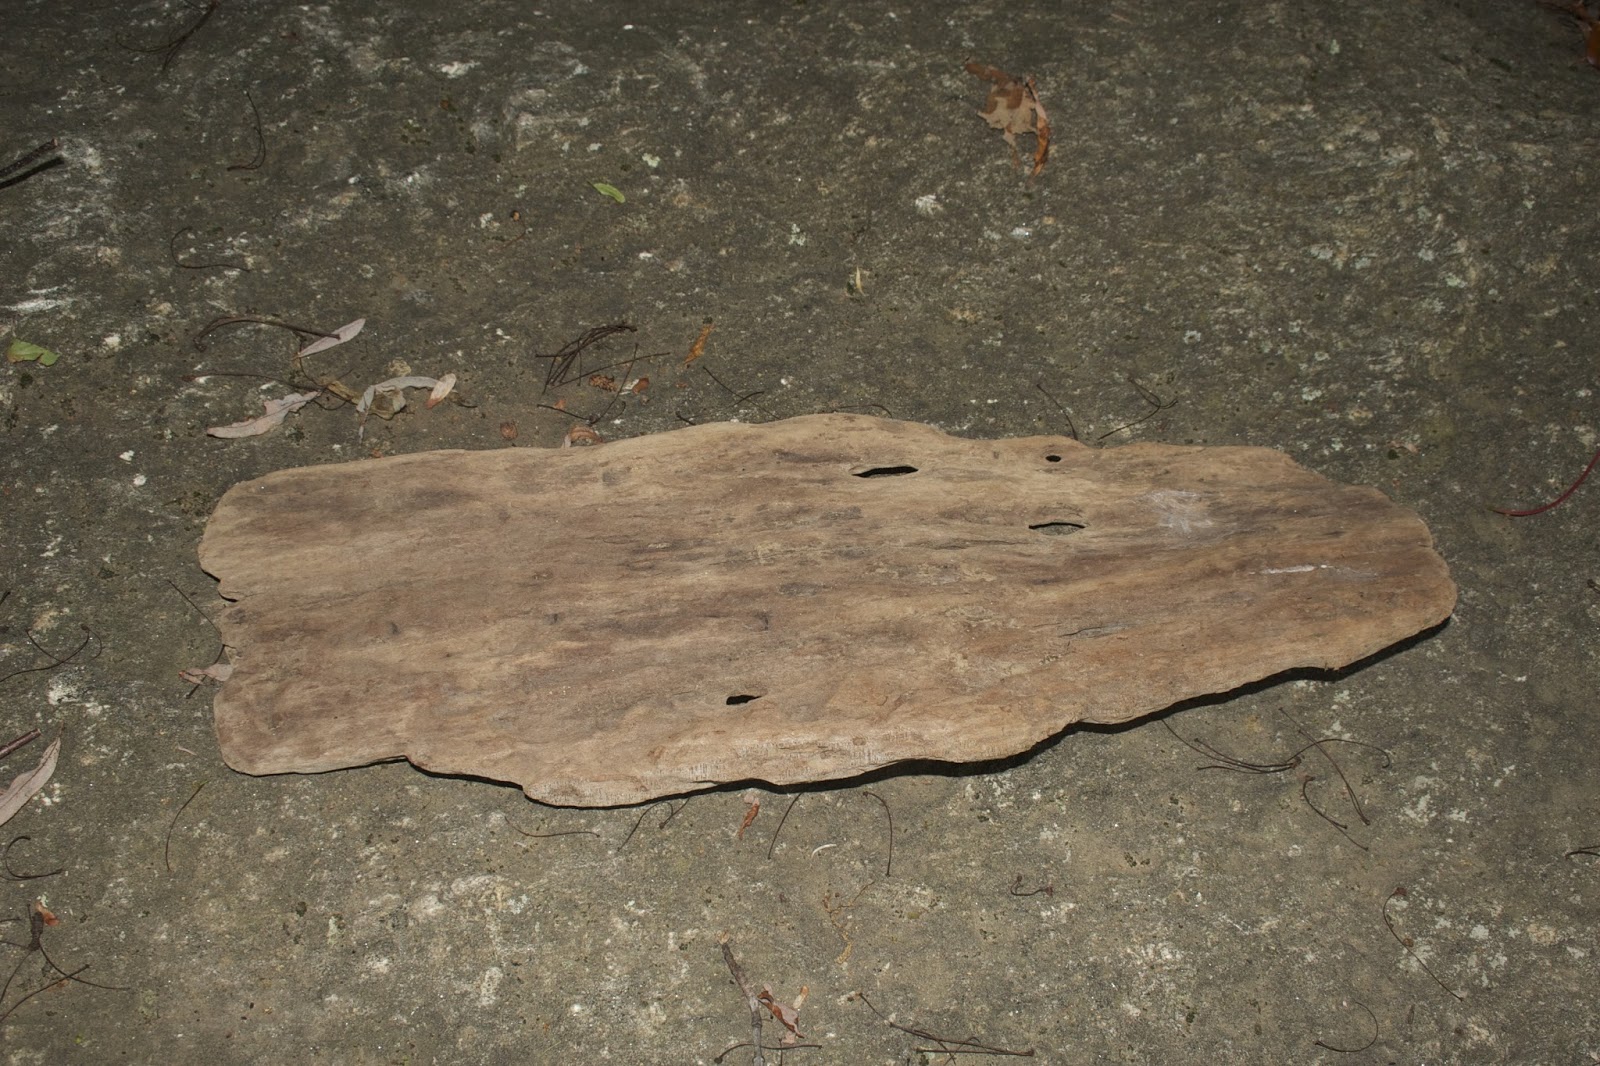
on this piece of wood:
As can be seen, the canvas presents some interesting challenges in terms of execution: the 'canvas' has a few fissures, including one that's 2 or 3 inches long. As well, the surface is not even - creating a lot of interesting texture that can be an obstacle when a lot of detail is involved. Thankfully, this particular painting is not as heavy on details as many others of Turner's, such as the Battle of Trafalgar:
my version Battle of Trafalgar on old barn door
The commission is a housewarming gift for a woman who is a great Turner scholar and talented painter in her own right. She has this to say about the Burning of the Houses of Lords and Commons:
"Turner has a unique way of capturing how lovely a fire can be. He always has signature bands of smoke and long streams of light that create amazing colors and movement! '"
A great way to see this is not only from the painting itself, but from many of the watercolour studies for this painting and other fires that Turner created, and which live at the Tate:
"The present Tower study is notable in being the only one of the nine to incorporate gouache: a touch of white is combined with scratching out to render a bright light through a window of the towers silhouetted towards the left. This may be an effect Turner observed or imagined, or perhaps the report caught his attention."
"This one of the most atmospheric and least detailed of the studies, but there are slight indications of the cuboid, turreted form of the White Tower to the right of the centre, suggesting that the view is from the north-east.
Addressing the sequence of studies in the context of the traditional former 1834 identification, Katherine Solender felt that the ‘fluid colours’ of this work, D24849 and D27852 ‘suggest burning architectural forms within an atmospheric setting, but these cannot be related to the fire at Westminster with any certainty’
"Addressing the sequence of studies in the context of the traditional former 1834 identification, Katherine Solender felt that the ‘fluid colours’ of this work, D27848 and D27852 ‘suggest burning architectural forms within an atmospheric setting, but these cannot be related to the fire at Westminster with any certainty’.1 "
"Here Turner appears to represent the roof and clock tower of the storehouse relatively intact, with crowds picked out at the edge of the moat at the lower left. The roof and clock tower fell at an early stage, and this study is possibly a fanciful view of the fire at the point when it was spreading from the Bowyer Tower, where it broke out, to the roof. On the left in the distance appear to be buildings on the near side of St Katharine Docks to the south-east."
Addressing the subject in the context of the traditional former 1834 identification, Katherine Solender nevertheless noted that this and another of the studies (D27846) ‘contain shapes alluding to classical architecture’, with ‘suggestions of columns and entablatures more closely resembling Greco-Roman structures than the British Houses of Parliament’,1 comparing them to the Turner watercolour, probably of the middle 1830s, known as The Burning of Rome (Tate D36232; Turner Bequest CCCLXIV 370), inferring the possibility of an ‘allegory’ of political decay.2 The close-set vertical features seem rather to be the narrow brick walls between the Grand Storehouse’s tall windows, with the pattern of alternating fire and brickwork repeated as reflections below. In his extended catalogue entry for Turner’s painting The Burning of the House of Lords and Commons, 16th October, 1834, exhibited at the British Institution in 1835 (Philadelphia Museum of Art),3 Richard Dorment presented a sustained interpretation of the this and the other eight watercolour studies in terms of a sequence reflecting the topography and chronology of the 1834 Westminster fire; he noted crowds watching along the bank.4
This watercolour study was originally one of nine consecutive leaves (D27846–D27854; Turner Bequest CCLXXXIII 1–9) in a sketchbook. They have previously been documented with varying degrees of certainty as showing the 1834 fire at the Houses of Parliament beside the River Thames in central London, but are here identified as representing the similarly large and dramatic fire which broke out at the moated Tower of London on 30 October 1841, destroying the late seventeenth-century Grand Storehouse (see the Introduction to the sketchbook for detailed discussion). This is one of the least architecturally defined studies, but the White Tower may be shown just to the right of the fire, south of the incandescent Grand Storehouse, and there seems to be a hint of pale buildings receding beyond the moat to the south-east on the left. Compare the equally elemental treatment in D27853.
"Here, the tall windows of the Grand Storehouse are lit by the fire within, and are shown from the north-west across beyond the moat and the dark masses of the outer defences. The composition is comparable with that of Destruction of the Small Armoury in the Tower of London, on the Night of 30th Oct., 1841, a lithograph after William Collingwood Smith (1815–1887) published on 8 November 1841, and the similar view in Destructive Fire at the Tower of London. October 30th 1841, a colour lithograph after J.L. Marks, a more graphic, unsophisticated rendering, enlivened by agitated crowds and galloping horses (see the Introduction for other comparisons between Turner’s studies and contemporary prints)."
The Turner catalog does not go into detail about the above sketch, which is a pity, because it looks just fascinating. The gouache adds a remarkable amount of white detail. In particular I love the dark masses on the top left and the bottom right. The crowds and details of the building are very apparent. A wonderful textured layered effect is apparent everywhere.
What I saw above demonstrates the way he can accomplish such luminosity, even with watercolours that did not use gouache. One obvious way of accomplishing this was through adding that remarkably heavy, dense dark blues and greys so that the areas he left white or washed over with yellow really stand out. This was occurring in all these sketches, but in particular the last two I posted really demonstrate this to me. Many more sketches, some just in charcoal, exist on the Tate website and I may have occasion to discuss them later.
This will be the first time in three years that I get to work on one of these delightful Turner works on wood, so I am supremely excited. The nice part of this one is, since I will only have one to work on, and a few weeks to prepare it, so I will have some time to really plan it well. I may succeed in achieving a depth of process that was only approximated when I was needing to churn them out within a 10 or 15 hour period! Hopefully I will not be working on it at the dead of night!